Woodworker's Journal 2004 Summer, страница 25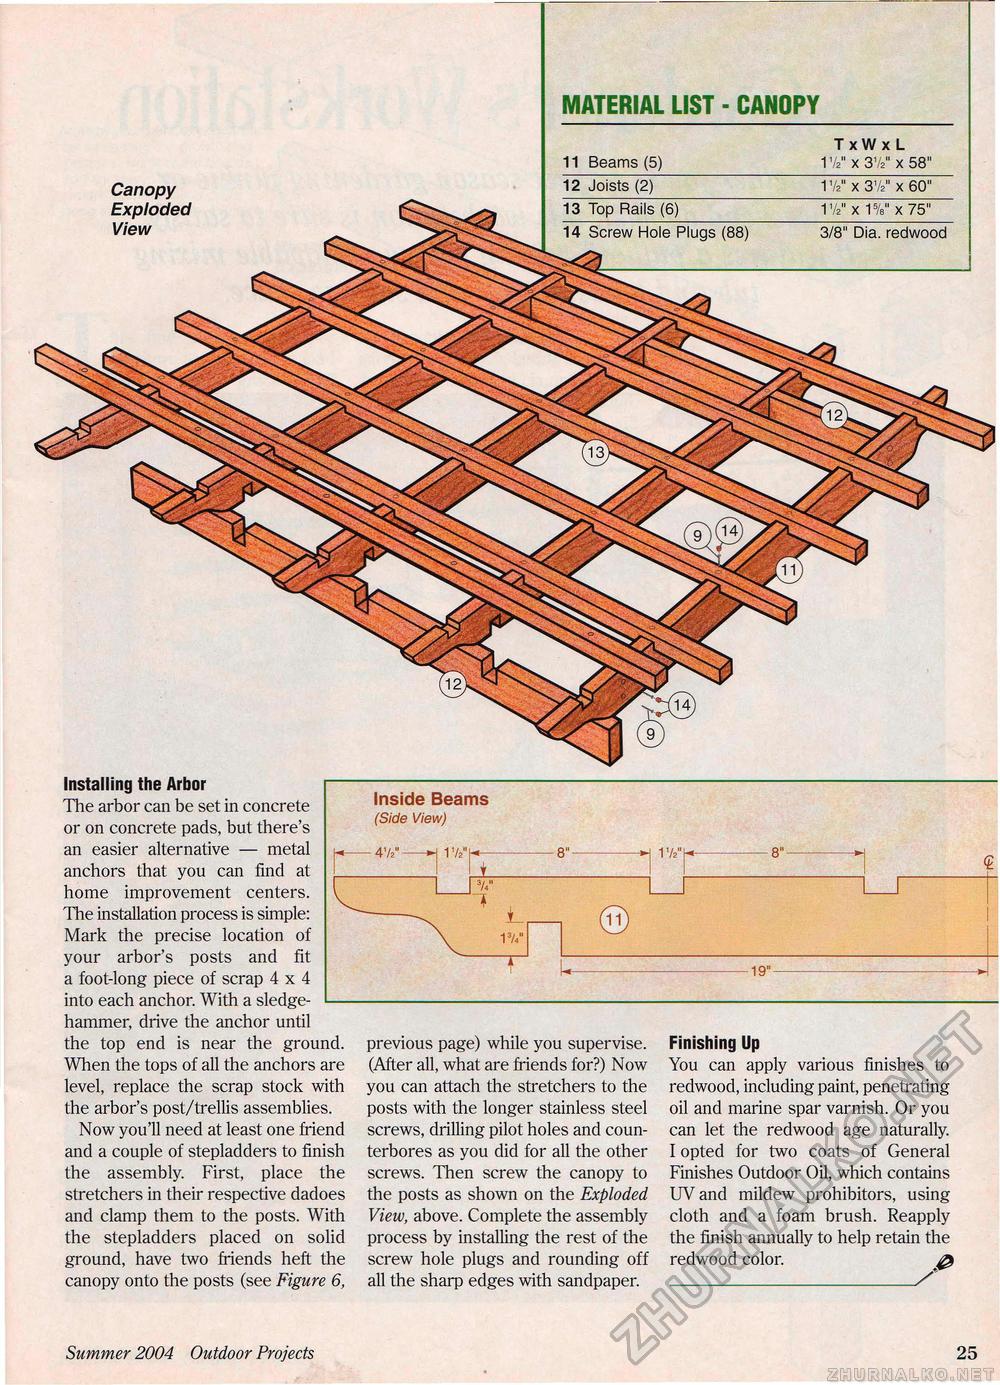
Canopy Exploded View MATERIAL LIST - CANOPY
Installing the Arbor The arbor can be set in concrete or on concrete pads, but there's an easier alternative — metal anchors that you can find at home improvement centers. The installation process is simple: Mark the precise location of your arbor's posts and fit a foot-long piece of scrap 4x4 into each anchor. With a sledgehammer, drive the anchor until the top end is near the ground. When the tops of all the anchors are level, replace the scrap stock with the arbor's post/trellis assemblies. Now you'll need at least one friend and a couple of stepladders to finish the assembly. First, place the stretchers in their respective dadoes and clamp them to the posts. With the stepladders placed on solid ground, have two friends heft the canopy onto the posts (see Figure 6, Inside Beams (Side View) 47/ ■ 17/ 8" 1 17/ "*1 8" 1 17/
previous page) while you supervise. (After all, what are friends for?) Now you can attach the stretchers to the posts with the longer stainless steel screws, drilling pilot holes and coun-terbores as you did for all the other screws. Then screw the canopy to the posts as shown on the Exploded View, above. Complete the assembly process by installing the rest of the screw hole plugs and rounding off all the sharp edges with sandpaper. Finishing Up You can apply various finishes to redwood, including paint, penetrating oil and marine spar varnish. Or you can let the redwood age naturally. I opted for two coats of General Finishes Outdoor Oil, which contains UVand mildew prohibitors, using cloth and a foam brush. Reapply the finish annually to help retain the redwood color. _/ Summer 2004 Outdoor Projects 25 |
||||||||||||||||||||||||||||||


